
How To Make DIY Dog Bed Without Sewing

Sweet dreams are made of this.
Want to learn how to make a DIY no-sew dog bed easily? Then look no further!
The title of this post may be DIY No Sew Dog Bed, but after a friend of mine shared this hilarious video the other day of cats stealing dog beds, I realized I had a much wider audience. Thieving cats and bed-less dogs, rejoice!
Really though, I know I get excited about our DIY projects, but this one has to be one of my ultimate favorites. I’m so in love with this easy-to-make dog bed that I made one for our living room, a second one that is long and skinny to fit across the backseat of our car, and I’m currently hunting down fabric for the third to go in our office!

What is great about this doggy DIY is it’s practical, you don’t have to know how to sew, it’s inexpensive to make, and it’s completely customizable.
You can really create any size you want and pick the fabric, which I love. I made one of the beds reversible by using different fabrics for both the top and bottom. You can get so creative with the colors and patterns, it has seriously turned into my new favorite hobby.
Also, don’t let the wordier list of directions scare you. Condensed down, its basically – cut, fuse, flip, stuff, fuse – really easy!
RELATED: DIY: No Sew Heart Dog Toy
Easy Step-by-Step Tutorial For No-Sew Dog Bed


Creating a snooze zone for your pet is incredibly rewarding. We are obsessed with this simple knotting trick. It is like a classic tie blanket but much fluffier!
You get a plush and durable result without a single stitch. Seriously, this no sew dog bed is foolproof for beginners. It is also a blast to make with the kids on a weekend. You can even match the fleece to your home decor.
Get ready for endless tail wags from your happy pup! Let’s get into the supplies you need to build this paradise.
What You Need
Before we start, let’s gather the goods. You probably have most of these lying around the house!
- Fleece Fabric: You need two pieces of the same size. Anti-pill fleece is the MVP here because it stays soft forever.
- Sharp Fabric Scissors: Trust us on this one. Dull scissors are a nightmare to work with!
- Ruler or Measuring Tape: A little accuracy makes those ties look pro.
- Masking Tape or Chalk: Mark your lines clearly so you don’t go off track.
- Stuffing: Grab some poly-fil fiberfill for that cloud-like bounce.
- Alternative Stuffing: Got old pillows or t-shirts? They work great too!

Instructions
Fasten your seatbelts because we are about to get crafty! Follow these steps for a bed your pup will adore.
Step One: Prepare Your Fabric
First things first, clear a big spot on the floor. Lay your first piece of fleece down and smooth it out. You want zero wrinkles messing up your measurements. Place the second piece of fleece directly on top. Make sure those edges line up perfectly!
If things look a bit wonky, give them a quick trim. You need a nice, clean rectangle or square to start. This base is super important for a sturdy diy pet bed. Double-check that both layers are total twins in size.
Step Two: Cut The Corners
This step is the secret sauce for a flat, neat bed. Grab your ruler and head to the corners. Measure out a 4-inch by 4-inch square at each corner. Mark it with your chalk or tape so you don’t miss.
Cut through both layers of fabric and toss those scraps. You will end up with a shape that looks like a cross. Why do we do this? It stops the corners from bunching up! Nobody wants a lumpy corner on their masterpiece. This simple trick ensures your diy dog bed looks professional.
Step Three: Create The Fringe
Now for the fun part! Let’s make those ties. Lay your ruler along one edge of your fabric stack. You are going to cut strips about 1 inch wide.
Each cut needs to go about 4 inches deep into the fabric. Power through both layers of fleece at the same time. Repeat this rhythm around all four sides of the bed. Try your best to keep the strips the same width. These little fringe strips are the anchors of your bed. If your hand gets tired, take a pause. Shake it out!
Step Four: Start Tying Knots
Here is where the magic happens and the bed takes shape.
Grab a fringe strip from the top blue (or whatever color!) layer. Find its matching partner on the bottom layer. Tie them together into a solid double knot. Give it a good tug! You want it tight and secure. It needs to be strong enough to hold all that fluff inside.
Work your way around three sides of the rectangle. Stop right there! Leave the fourth side wide open. You need this gap to stuff the bed comfortably.
Step Five: Stuff The Bed
Time to turn this flat fabric into a puffy cloud. Grab big handfuls of your poly-fil or recycled stuffing. Push it deep through the open side of the no sew dog bed.
Make sure you shove stuffing way back into the corners. You want every inch to be supportive and cozy. Keep filling until it looks inviting but not ready to burst.
Give it a squeeze test with your hand. Does it feel firm enough for your dog’s weight? If using old clothes, double-check for hard zippers or buttons.
Step Six: Close The Gap
You are almost at the finish line! Let’s seal the deal. Go back to that open side with the loose strips. Tie the remaining fringe pieces into tight double knots. Keep tucking the stuffing in so it doesn’t sneak out. Once finished, do a full quality control check.
Go around the whole bed and tug on every single knot. They must be super secure for safety reasons. We don’t want the diy pet bed popping open during zoomies! Your dog’s safety is always the number one priority.
Step Seven: Fluff and Finish
You did it! Pick up your creation and give it a huge shake. This helps the stuffing settle evenly into all the spots. If the fringe looks a bit wild, give it a trim.
Place the new throne in your pup’s favorite sunny corner. Call them over with a treat and watch them explore. The best part? This bed is totally machine washable. Just toss it in on a gentle cycle whenever it gets messy. Air drying keeps that fleece feeling soft and luxurious. Now, grab your camera and snap some pics of your happy pup!

FAQ
What fabric is good for making a pet bed?
Fleece is the absolute winner! It is durable, super warm, and won’t fray.
Is it hard to make a diy dog bed?
Not at all! It requires zero special skills and takes just about an hour.
Check out our other fun DIY projects to spoil your pup – including our No-Sew Dog Bandana, No-Sew Dog Scarf and No-Sew Heart Dog Toy!


Looking for a designer dog bed?
Check out our Dog Beds & Blankets category in the Pretty Fluffy Dog Lovers Directory!
Our shopping guides feature only the best of the best vendors for the discerning dog owner.

Pretty Fluffy is the ultimate lifestyle destination for dog lovers. Discover the best designer dog brands and emerging small pet businesses, the latest dog accessories, healthy dog treat recipes, dog training tips and more. Thank you for being part of our dog-loving community!
Pet lifestyle expert Serena Faber-Nelson is the founder of Pretty Fluffy. A contributor to Everyday with Rachael Ray, Modern Dog Magazine, Cesars Way and more; her modern, stylized take on DIY dog treats has seen her recipes viewed millions of times over.
Serena is the author of the go-to dog mom bible, Dog Mama, and the popular dog treat recipe book, Healthy Homemade Dog Treats.


-
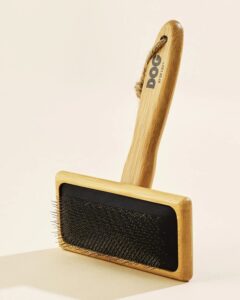
 DOG By Dr Lisa Dog Brush
lovely everyday brush for dog parents who want something gentle and easy to use.

-
DOG By Dr Lisa Dog Brush
lovely everyday brush for dog parents who want something gentle and easy to use.
Love this. I may try to make my next dog bed myself! I’ve also used dog bed covers that are a similar concept (but they are sewn) – there’s a few sellers on Etsy that sell them, I like this one’s designs the most: https://www.etsy.com/shop/thefoggydog.
Governo do Estado ainda não se pronunciou oficialmente a respeito de incidente na Facam e acima de os transtornos
aos candidatos privados a fazer concurso.
Since I don’t own an iron, do you think the peel and stick fusion tape would hold up well?
If so, do you recommend one?
SO cute! Looks like Coco Bean loves it! : )
Kayla
http://www.lovelucygirl.com
Such a cute idea, and perfect as a holiday gift. So cute, I had to post it 😉
Love Love the beds!! Great idea and Perfect size for Coco!
I love this! I also adore all three fabrics that you used – who makes them, do you know?
Thanks, Rose! So glad you like them! I’ve pasted the links to the fabrics below. 🙂
The black & white fabric is from Hobby Lobby: http://bit.ly/1c9Dg4E
The gray ikat fabric is from Joann Fabrics: http://bit.ly/1c9DKIj
The polka dot fabric I’ve had lying around for a while, I believe it was from Joann Fabric. Unfortunately, I’m not sure who it was made by!
Gorgeous! Coco looks so happy on her new beds!
I love that you can make each side a different colour/print – and it’s so easy! No wonder you couldn’t stop at one!
Thank you! She is loving them. She feels extra special! 🙂
Was just interested in finding out if the bed is fine to put in the washing machine, if not what is the best way to keep it clean.
Hi Karen! I haven’t washed mine yet, but I would definitely stick with a delicate wash cycle and tumble drying with little to no heat. Since it is not sewn in, I would stay away from high heat so that it doesn’t loosen the hemming tape. 🙂